Thanksgiving Menu (gluten-free, mostly paleo)

I am feeling especially grateful that this Thanksgiving, my daughter can enjoy everything at the table. After nearly two years of maintaining a very low carb diet to control her seizures, over the last month or so, she has been experimenting with more typical servings of gluten-free carbs, like slices of pizza or several plates from the sushi train, and not experiencing any seizures or seizure auras as she used to experience. Most children with Benign Rolandic Epilepsy outgrow their condition sometime during puberty. Fingers crossed, but perhaps we have reached the end of epilepsy.

We maintain a gluten-free and mostly grain-free and sugar-free diet, with occasional gluten-free baked goods away from home. Thanksgiving dinner includes a couple such exceptions. Cornbread is one of my daughter’s favorite, so we’ll celebrate her new-found dietary freedom with cornbread, kale, and pear stuffing. In addition, we’ll have two desserts, both sweetened with honey or coconut sugar, instead of the stevia that had been our only sweetener.

Do you have any particular graces to give thanks for this year?

2013 Thanksgiving Menu

Spinach-Artichoke Dip
Chipped Beef Cream Cheese Ball

Three-Seed Crackers

Arugula, Fennel, Pomegranate, and Mandarin Salad

Orange & Sage Roast Turkey with Deceptively Delicious Gravy

Cranberry Sauce Two Ways

Green Bean Casserole

Cornbread, Kale & Pear Stuffed Acorn Squash

Crispy Root Vegetable Latkes

Cauliflower-Parsnip Mash

Pumpkin Custard

Apple Pie with Crisp Topping

Posted in Uncategorized | 2 Comments

Salmon and Cauliflower Curry, a Nutritional Powerhouse

Flash photography doesn’t make this dish look that appealing…but really, it tastes delicious!

This salmon and cauliflower curry is one of my favorites. It became a mainstay one summer solstice. I always like to prepare yellow and orange foods on the solstice, to celebrate our life-giving Sun. I wanted to make a bright yellow curry, with a thick sauce that would cling to the vegetables and salmon.

What I came up with is not only delicious, but full of healing ingredients. Cauliflower and turmeric fight prostate cancer and turmeric blocks the development of melanomas. Given that my husband’s family has a history both, I’m especially glad this dish has become one of our favorites. Turmeric has many other health benefits and worth including in your diet. Since it is fat-soluble, always include some fat with the meal to increase absorption. Salmon, of course, has many health benefits, especially its omega-3 fatty acids. Add some yogurt with live probiotics and cilantro with its many health-promoting properties, and you have yourself a dish chock full of awesome nutrition.

Salmon and Cauliflower Curry with Turmeric
Serves 5-6

2-4 tablespoons ghee
1 tablespoon black mustard seeds
1 tablespoon plus 1/2 teaspoon curry (I skip the cayenne), divided
1 onion, sliced
1 head cauliflower, cut into bite size florets
1 tablespoon minced garlic
1 tablespoon minced ginger
water (a cup or so)
1-2 cups yogurt
1/2 teaspoon salt
5-6 salmon fillets (about 1.5 pounds total)
a few tablespoons of chopped cilantro
salt and pepper

Melt the ghee in a wide, flat bottom saute pan over medium-high heat. I start with 2 tablespoons, then add more as needed. Add the mustard seeds and curry powder the pan and cook for a moment, allowing the curry to dissolved into the ghee. Add the onion and cauliflower, tossing gently to coat with the ghee. Cook for 10-15 minutes, leaving the vegetables to sit for several minutes at a time so they can brown while carefully monitoring the heat so they do not burn. Melt more ghee in the pan, then add the garlic and ginger and cook for a minute. The garlic and ginger will stick to the pan. Add a half cup of water to the pan, let it cook off briefly, then deglaze the pan, scraping off the cooked on bits. I find that a bamboo stir fry spatula deglazes well without scratching the pan.

Mix 1/2 teaspoon curry and 1/2 teaspoon salt, then rub into salmon fillets. Place the fillets skin-side down on top of the vegetables. Add another half cup of water, then cover the pan. Cook for 7-10 minutes, until the fillets are cooked through. Remove the fillets to a warm serving dish, turn the heat to low, deglaze the pan with another half cup of water if necessary, then add yogurt, cilantro, salt and pepper to the pan, stirring gently to make a thick sauce. Serve immediately with the fish.

This post is part of The Liberated Kitchen’s GAPS Friendly Friday.

Posted in Uncategorized | Leave a comment

Food Heals!

A little over two years ago, my health went into a serious decline. I was tired all the time. I had chronic pain throughout my body. My memory had become completely unreliable and I had trouble concentrating. I was losing my ability to function as a homeschooling mother of two, community activist, and small business owner. I had gone to many doctors about my various complaints, but none of them had been able to help with my list of vague symptoms.

Through a series of chance conversations and research, I came to understand that I have an autoimmune condition known as Hashimoto’s thyroiditis, the most common form of hypothyroidism. While a decade before I had been diagnosed as “mildly hypothyroid” and told my thyroid gland was not making enough thyroid hormones, none of my doctors had mentioned the possibility of an autoimmune aspect to my condition or suggested that I do anything other than take a daily thyroid hormone replacement pill for the rest of my life.

I began to see a naturopath experienced with Hashimoto’s. Lab tests she ordered confirmed my self-diagnosis. My body is manufacturing antibodies which attack my thyroid gland. This immune system attack suppresses the thyroid’s function and slows the entire metabolism. My list of vague symptoms were all due to inadequate treatment of my autoimmune condition, but the good news is alternative health care providers are reversing this disease with a protocol of dietary changes and supplementation developed by Dr. Datis Kharrazian, a specialist in endocrinology.

While I already knew a lot of people who had experienced healing after removing gluten from their diet and had cut down significantly on my wheat consumption, I didn’t eliminate it completely until I became desperate. Within a week of quitting however, I noticed improvements to my digestion and mental function. With more changes came more improvements.

Today, I follow an autoimmune gut repair diet, free of not only of gluten but all grains, sugar, legumes, nightshades, and caffeine. I feel better than I have in ten years. After struggling with my weight all my adult life, I’m finally losing it, with a balanced diet of pastured meat, wild caught fish, and seasonal vegetables, enriched with healing super foods like broth, ghee, and kimchi. My energy has returned, my chronic pain is diminished. Recent blood work showed that all my health markers are improving remarkably. My thyroid antibody levels, for example, dropped for the first time in two years of testing, by half over a six month period of intense dietary change. Food heals!

Annabel’s Story

Annabel, about a week after her last dose of anti-convulsant meds!

In late 2011, after a series of partial seizures, my daughter Annabel was diagnosed with epilepsy. At first, her doctor said she did not require medication. In January of 2012, though, she experienced a seizure episode known as status epilepticus, a lengthy and potentially life-threatening seizure that only stopped when EMTs gave her a powerful tranquilizer. She was hospitalized for a day of observation. The SE episode was a game-changer and her neurologist advised us to put her on an anti-convulsant to prevent further such episodes. We reluctantly agreed.

As my husband and I were concerned about the many side effects of her new medication, I began researching alternatives before she even came home. I learned about fat-rich, low-carb diets that control seizures in children whose seizures were not controlled by medication. Why not try it with our daughter, instead of medication? While her neurologist discouraged us from even trying, saying it was “too hard,” she clearly did not realize who she was trying to discourage. I was determined to do whatever I could to keep Annabel seizure-free, but also off a medication so potentially damaging that her liver function was to be tested every three months while she was on it. I put her on the Modified Atkins Diet soon after she got home, with the intention of weaning her off medication as soon as possible.

It wasn’t easy. Transitioning a child who loves French fries, pasta, bread, and sweets just as much as the next kid to a diet that limited her to 10 grams of carbohydrates a day challenged both of us tremendously. I knew her compliance depended on having foods that she could enjoy, so I scoured the internet and cookbooks for ketogenic recipes. As I learned keto cooking tricks, I began coming up with modifications for our family favorites that were safe for her. We celebrated her ninth birthday with ketogenic cupcakes.

Eventually it worked. Our daughter’s seizures diminished in frequency and severity. We noticed that when she did have seizures, they almost always occurred after she “cheated” on her diet. On July 22nd, she took her last dose of medication, six months to the day after her first. She has remained seizure-free since and while she maintains her low-carb diet, she can now an enjoy occasional honey-sweetened treat. Once again, food heals!

Turning Our Challenges into a Blessing

While healing my daughter and myself with diet, I learned a lot about cooking nutrient-dense meals that comply with multiple restrictions. The learning curve, for someone like me who loves cooking, was steep. If you don’t have a knack or passion for planning, shopping, and preparing meals, especially special diet meals, and are sick or caring for a loved one with special needs, getting satisfying meals on the table night after night can seem next to impossible. So, I have decided to become a personal chef to help others who struggle with their health and need more nourishing food to heal. I’ll still teach cooking classes as there is interest and will also offer private cooking lessons and kitchen coaching.

I’ve launched an Indiegogo campaign to raise the funds I need to re-launch Lost Arts Kitchen. I have some fun perks for contributions small and large. Even if you cannot make a cash contribution now, it would mean so much to me if you could spread the word. Please tweet, share on Facebook, or send an email to friends who would like to support my campaign. Thank you!


Posted in Uncategorized | 8 Comments

In My Cocoon…

I am on a break from blogging and teaching while I work on some new possibilities. Come back soon, I promise to be back with some exciting announcements!

Posted in Uncategorized | 5 Comments

Food Swap & Pot Luck with Kate Payne

I’m thrilled to announce that we will be hosting a food swap and potluck here on June 24th in honor of Kate Payne, author of The Hip Girl’s Guide to Homemaking and founder of the Brooklyn and Austin food swaps. The lovely ladies at PDX Swappers co-host and I’m so grateful for their swap organization finesse! Space is limited and going fast. You must fill out this form to reserve your spot.

Posted in Uncategorized | 1 Comment

Lost Arts Kitchen, in Cooking Light?

Kinda funny to see Lost Arts Kitchen mentioned in a magazine that would probably never publish one of my animal-fat laden recipes, but totally awesome to be included in this round-up of businesses that make Portland “one of the most exciting food towns in the country.” (See reason #2.)

Posted in Uncategorized | 1 Comment

Eating Local Meal Plan for Spring

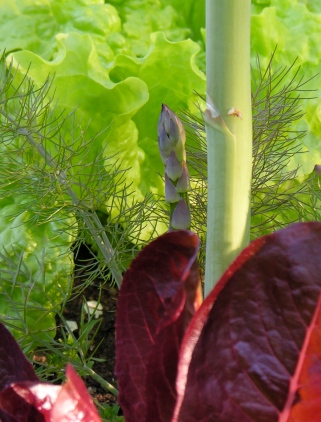
Salad Greens & Asparagus in the Garden

What I hope to illustrate with the following meal plan for next week’s Seven Days 100% Local challenge  isn’t so much that there are many delicious fresh foods you can pick up at the farmers market this weekend. There are, but in my experience, eating locally in a manner one can sustain not just for a week, but year-round, requires more than what farmers can harvest in any given week. Preserving food at home or buying locally grown and preserved foods keeps it local while keeping your wallet and your taste buds happy.

Some tips

  • If you haven’t yet figured out how to make your own cream cheese or don’t have home canned Oregon albacore tuna on-hand, try eating “as-if” local as a palate re-training exercise. Buy the non-local version if you must, but if it’s something you like, consider figuring out how you can start sourcing it locally in the future.
  • If you work outside the home during the week, do some meal planning, food shopping, and prep over the weekend. Make a big batch of pork patties on Sunday morning and hazelnut granola while the oven is still warm. Start apple-rhubarb sauce Sunday afternoon while you prepare the pear and rhubarb crisp, and get chicken stock started after dinner.
  • Likewise, prepare enough food for dinner and leftovers for lunch, especially for those who eat away from home.
  • Doing some prep work after dinner will make it easier to get dinner together the next day.

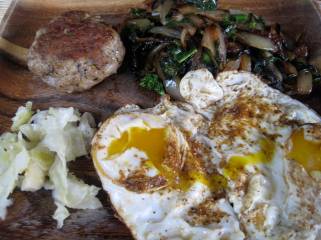
Hearty and savory local breakfast: pork patty, fried kale & onion, fried eggs, homemade sauerkraut

Sunday

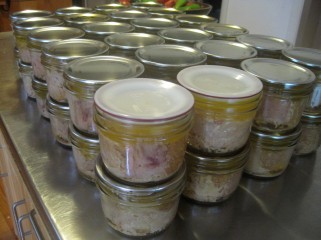
Canned Oregon Albacore Tuna

Monday

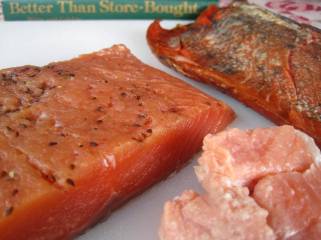
Salmon preserved three ways. Clocckwise from left, gravlax, smoked salmon, pickled salmon.

Tuesday

  • Smoked Salmon & Cream Cheese Scramble
  • Chicken Soup
  • Slow Cooker Carnitas with Home Canned Salsa Verde, Coleslaw, Black Beans, and Grated Cheddar
  • Cinnamon-Honey Custard
  • Drain yogurt for sirkand
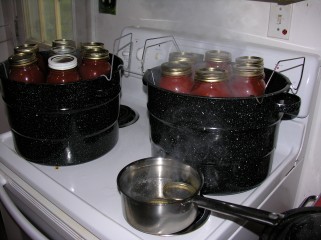
Canning Tomatoes

Wednesday

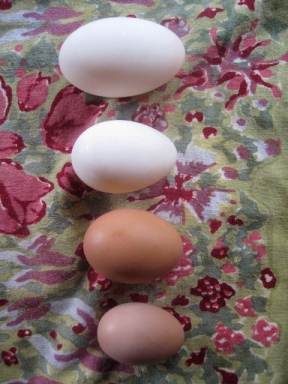
Goose, Duck, Hen, and Pullet Eggs

Thursday

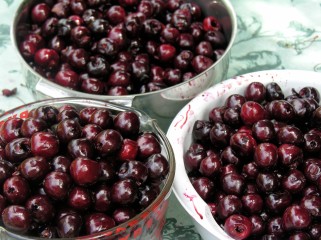
Lots of pitted Bing cherries, summer 2009

Friday

  • Pork Patty, Fried Onions and Kale
  • Leftover Eggs Korma
  • Slow Cooker Lamb Stew with Frozen Peas, Carrot and Hazelnut Salad
  • Cherry Caflouti
  • Defrost salmon

Saturday

  • Pancetta, Eggs Over Easy, Sauteed Onions & Overwintered Kale, Hazelnut Meal Pancakes with Honey-Sweetened Sour Cherry Sauce
  • Leftover Celery Root Soup
  • Salmon with Asparagus, Pea Shoot and Radish Salad
  • Pinot Noir Poached Pears (use honey instead of sugar) with Cream
Posted in local food | Leave a comment

A Week of (Almost) 100% Local Eating

Asparagus, Stinging Nettle, Salami, and German Butterball Potato Quiche-to-Be

The Seven Days 100% Local challenge calls for 100% local eating for the week of April 18th. We’re participating, sorta. In honor of the challenge and Earth Day, I’ll be blogging for the next week about eating local.

Contrarian that I am, I’ll start off with a bit about what what my family does not eat local, as well as what we do. In the coming days, I’ll share a meal plan for the week based on what’s available here in Portland now, information about sourcing affordable local food, and preservation methods that make eating year-round tasty and nutritious.

While I am an advcoate of local eating, I personally don’t follow a 100% local diet and while the 100% local challenge is an interesting one, I know we won’t follow all the rules for next week’s challenge. For my family, eating local is an everyday, year-round practice and in order to keep us all happy, I cook with some select foods from afar. Here are my exceptions and reasoning.

  • Since they can be dried in their place of origin and shipped (rather than flown, like a lot of farflung produce) the carbon footprint of spices is relatively low. Considering how much variety and interest they add to the diet, as well as their medicinal qualities, I have chosen not to exclude them from my diet or this menu plan. I buy whole, fair trade, organic spices in bulk and I grind them as I need them.
  • I make my own vanilla extract with organic vanilla beans and organic grape neutral spirits from Alchemical Solutions.
  • I have been waiting for someone to start producing Oregon Coast Salt, but in the meantime, I use Celtic Sea Salt, which I buy in bulk and grind by hand at home.
  • Lemon and lime juice are in some of my canned goods and recipes. I buy Santa Cruz Organic juices in bulk. I also make preserved lemons when Meyer lemons are in season in California. While I use a lot of fermented fruits and vegetables to provide a tangy zip in most of our meals, lemons and limes are essential  in some dishes.
  • I use cheese making cultures (from New England Cheesemaking Co.), baking soda, and other products (wine, vinegar, salami) that may have yeasts, bacteria, enzymes, and preservatives from far away. Incredibly small amounts of these additives make homemade cheese, baked goods, bacon, and preserves possible in our everyday life.
  • My family is on a grain-free diet, which actually makes it easier in some ways to eat local, as most of our meals are just meat or eggs and vegetables. One big exception to buying local is almond flour, which I use for baking. I buy it in bulk from Honeyville in California.
  • We buy Marine Stewardship Certified Alaskan halibut and salmon. These fisheries are well-managed and still strong.
  • We also eat coconut (milk, butter, oil) and I drink locally roasted fair trade, organic coffee. I make my own honey-sweetened chocolate.
  • During the winter, I buy oranges, mangoes, and bananas for my kids. I torture them enough with restricting grains, sugar, and processed foods (which are basically grains + sugar + chemicals). This is my mother-guilt compromise. At least I can say that citrus is naturally at its peak in winter.
  • Lastly, we do indulge in off-season fresh produce occasionally, particularly when I have a cold and want to make some Tom Kah with snow peas in mid-April. I make no claims of purity or perfection in any aspect of my life, but I do constantly strive to find ways to improve on what I’m doing.

The local foods we eat:

  • Local meat and seafood, including beef, pork, lamb, goat, chicken, rabbit, turkey, duck, goose, tuna, crabs, salmon, trout, and shrimp. I the land animals are pastured, the seafood wild-caught. Like with everything, I make the most of the animal food we buy, making bone broths and rendering fats.
  • Local milk (cow and goat), cream and butter, from which I make yogurt, cream cheese, sour cream, creme fraiche, ghee, chevre, feta, cottage cheese, paneer, and mozzarella, though lately we haven’t been using much dairy at all.
  • Chicken and duck eggs from our backyard birds or local farms when our girls’ production is low.
  • Local fruits and vegetables frozen, dehydrated, jammed, pickled, sauced, fermented and juiced at home. We grow some ourselves, but most comes from local farms.
  • Local nuts hazelnuts and walnuts.
  • Local honey.
  • Herbs that we grow ourselves or buy from local farms.

That’s a lot of foods! I couldn’t say for sure how much of our diet is local on a weekly basis, but I’d guess about 75-80% of our calories come from within 100 miles. Many of the farms I buy from are less than 30 miles from our home. Oregon’s awesome that way

While I’d like to get even more local foods into our diet, I’m pretty satisfied with where we’re at at this point. Considering that less than 10% of American meals are made from local foods, getting to even 50% of calories from within 100 miles would be a huge breakthrough. So, rather than encourage you to eat 100% local and then give up in frustration or culinary boredom, I’d like you to see what local eating can look like in my next post about a week of local-based meals, and learn how to get your own affordable, local food, which I’ll cover in subsequent posts.

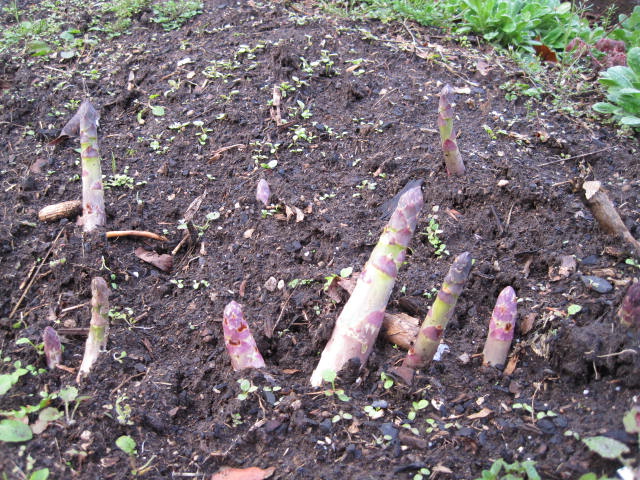
Asparagus Babies

Posted in Uncategorized | Leave a comment

Sweet Success with Sauerkraut

You know all about the health benefits of lactofermented foods like sauerkraut–how it aids digestion, replenishes essential gut flora, boosts the immune system–but maybe you’re nervous about leaving food out on the counter for several days or maybe you’ve tried making sauerkraut or pickles before and not gotten the results you expected. In my classes and on various email lists, I frequently hear tales of sauerkraut woe. Moldy, soggy, stinky (in the wrong way), sad kraut. The thing is, I’ve been making it for years and even early on, I’ve never had a kraut go wrong. I doubt I’m some sort of mad kraut genius, but I have a feeling that there is something about the combination of ingredients and method I use that’s making a difference. I’m not sure which of these are key, but here are some possible reasons for my kraut success:

  • I always add seeds in my kraut. Usually juniper berries and caraway, but sometimes celery seeds, cumin, or dill seed seeds. Seeds contain enzymes that protect the kraut from putrefying microorganisms. According to Wild Fermentation author Sandor Katz (who is a mad kraut genius), you can even make a low-salt kraut with lots of seeds.
  • I also always add fresh minced ginger. Ginger makes the kraut extra refreshing, but it also has anti-microbial and anti-oxidant properties and has traditionally been used to help preserve foods.
  • One key to good ferments is having plenty of liquid on top. The salty brine provides a barrier to putrefying bacteria. Keep the baddies out by pressing down hard when packing the kraut into a jar or crock, which forces the expressed water to the top. The cabbage will reabsorb this salty brine during the fermentation. Pressing the kraut during the initial fermentation period can get enough liquid to rise to the top again, but if not, add salted water to cover (1 tablespoon dissolved in a pint of water).
  • I cover my kraut with a lid to keep out airborne molds and yeast. I’ve read suggestions to only cover the kraut with a cheesecloth or a towel during fermentation, but that strikes me as an invitation to bad guys. The explanation for this practice, I understand, is to allow the ferment to expel gases. So, when fermenting in a glass jar, I cover the jar with a loosely tightened lid, or when fermenting in crocks, I cover the crock with a plate. Gases can still escape, but the ferment is less vulnerable to intruders.
  • I ferment on the counter in my kitchen, which is typically 65F to 68F, and check on my kraut’s progress daily. In summer, when my kitchen is warmer, I keep a closer eye on things and do the counter-top ferment for three days instead of four.

With all that in mind, here’s how I recently began a large batch of sauerkraut.

Kraut Set Up

  • When preparing a small batch of sauerkraut I pack it in a half-gallon canning jar, but here I’m making a 3 gallon batch, so I pulled out one of my Pacific Stoneware crocks (made in Portland, probably in the 1940s).
  • For the initial mixing and pounding, I find it easier to work in a vessel that’s even larger than my fermentation vessel, so that’s why I’ve also got my 18-quart stainless steel stock pot. Its flat bottom makes it easier to pound the kraut. Bowls can be harder to work in. By the way, while I am mixing and pounding the cabbage in stainless, don’t ferment in stainless steel (acids can etch it over time)–only glass or stoneware. Some folks ferment in plastic, but I would suggest not doing that as even food grade plastic can leach when in contact with acidic food.
  • The wooden tool there is a kraut pounder, which is handy for pressing kraut, but as you’ll see in a bit, also for grinding spices.
  • I’ve weighed the cabbage and measured my ingredients according to how much cabbage I have.
  • While a cabbage shredder might be handy, I make do without one but I do sharpen my chef’s knife before getting started. I’ve used my food processor on occasion, but I find that since I have to chop the cabbage into chunks that are small enough for the feeder tube anyway that it’s actually more efficient to chop by hand. But that’s me.
  • Another indispensable tool in my kitchen is my Microplane. I use it to mince ginger here, but it comes out daily to mince garlic, grate hard cheeses and spices like nutmeg. It makes such short work of mincing even a big chunk of ginger that again, it’s not worth pulling out and washing my food processor. Poor neglected food processor.

Sauerkraut
Makes about 3 gallons

3 tablespoons juniper berries
3 tablespoons finely minced ginger
3 tablespoons chopped baby dill
3 tablespoons caraway seeds
9 tablespoons sea salt
15 pounds green cabbage

Using a mortar and pestle (or, in this case, mortar and short end of a kraut pounder), lightly crush the juniper berries.

Yes, you too can get your very own from krautpounder.com

Chop the cabbage as coarsely or finely as you like. I like some big pieces in mine.

Place half of one chopped cabbage in a large, flat bottomed vessel. Sprinkle 1-1/2 teaspoons each of juniper berries, caraway, ginger, and dill and a scant tablespoon of salt over the cabbage. You could also mix the seeds, ginger, dill and salt together and sprinkle about 2 tablespoons of the mixture over each layer.

Using a kraut pounder, the end of a rolling dowel, your fist, a meat tenderizer, a mug, or some other flat object, press and pound on the cabbage for a minute.

Repeat with each cabbage half. By the time you are finished, there should be an accumulation of brine in the kraut-to-be.

Brine pooling in kraut

You can walk away for an hour or so while more brine accumulates, or you can start packing the cabbage into your fermenting vessel now. Press down hard as you pack layers of cabbage into a jar or crock. To keep the cabbage covered with brine, weigh it with something that just fits inside your vessel. Short, narrow-mouth half-pint jam jars fit well inside wide-mouth canning jars or find a plate or bowl to nestle inside your crock. Fill the jar or bowl with water as needed to keep it from floating. Below, I have put a shallow bowl inside the crock and let the brine partially fill the bowl, though I may pour that back into the crock as the cabbage re-absorbed the brine.

Kraut in crock, weighted with wide bowl

Cover the crock with a plate (if you’re lucky enough to have a crock that still has its lid, use that of course) or loosely tighten a lid on the jar if that’s what you’re using.

This time of year, I let sauerkraut ferment on my counter for four days, checking it daily to see that the cabbage is still covered with brine. I then place the fermented cabbage in canning jars, again pressing it well as I pack it, and store the jars in the fridge. Kraut continues to ferment in the fridge and develops more complex flavors over time. I like to let mine sit for a couple weeks in the fridge. Some folks swear kraut isn’t worth eating ’til it’s at least six months old. It will keep for months and I’ve even experimentally left jars in my fridge for over a year to find still crunchy, delicious kraut.

As you finish a jar, be sure to get a new one started. Once you’ve gotten used to having homemade kraut around, you won’t want to be without it!

Some ways to use your kraut:

  • Heat up some broth, add some cooked meat or an egg yolk, remove from heat and add some kraut. Even better, make lactofermented borscht.
  • Saute some onions, add peeled apple chunks, sauerkraut, and sausages (bratwurst, weisswurst, Polish or Hungarian sausages are our faves). Cover and steam for a few minutes, ’til everything’s warmed through.
  • Add to soup. Practically any soup is improved with sauerkraut, except those improved with kimchi or preserved lemons. Okay, even those taste good mit kraut.
  • As a part of your healthy breakfast.
Posted in Uncategorized | 23 Comments

My Elaborate Breakfast with Perfect Pre-cooked Pork Patties

I posted recently on my other blog about the new breakfast-in-a-muffin I’ve been experimenting with in an effort to reign in my usual lengthy breakfast prep routine. Well, the muffins are great, but I still like my morning routine, especially now that the weather’s so fine and the garden is starting to produce some of my favorite breakfast veggies. I wanted to show you around my garden a bit, entice you to try a big breakfast yourself, and also tell you about one of my tricks to make this elaborate breakfast a wee simpler to prepare.

Overwintered kale, starting to make delicious flowers. Kale rabe!

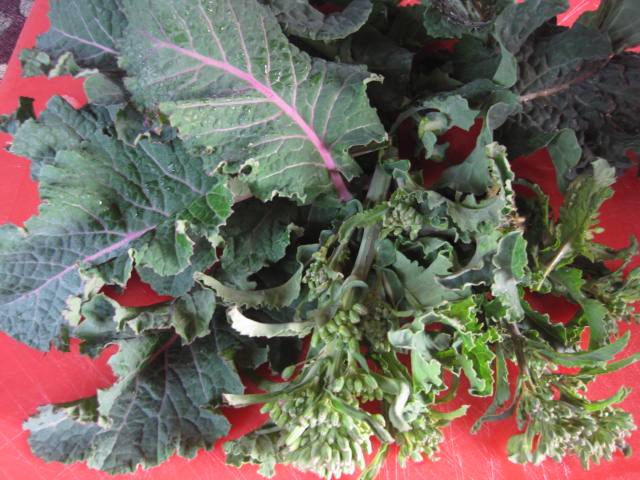
Kale, especially the tender young leaves and flower buds, is one of my favorites to saute with onions in the morning, but my very favorite, wait-for-it-all-year-and-gorge-throughout-the-season vegetable is asparagus. Looks like we’ll be eating that within a week.

Chubby asapargus babies. Aren't they cute? Couldn't you just eat them up??

I cut a few leaves and flower buds and head back inside.

Kale leaves and buds

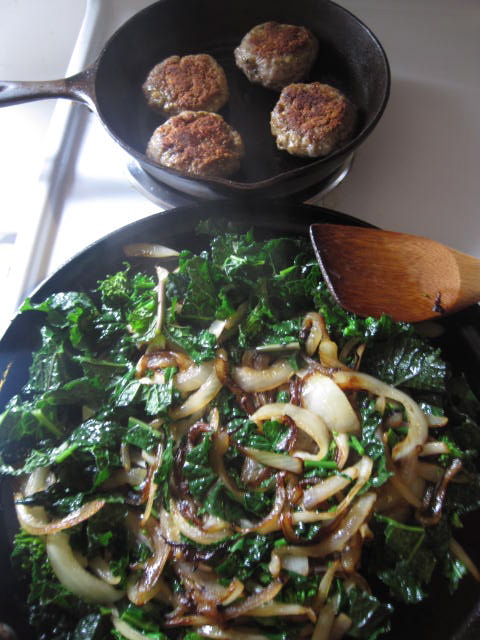
Before I stepped out to get kale and admire the asparagus, I began gently reheating some pre-cooked pork patties and frying onions on the stove. I add the chopped kale to the onions and cook them for a few minutes, just long enough to soften the stems and bring out their color.

Pork patties, kale & onions

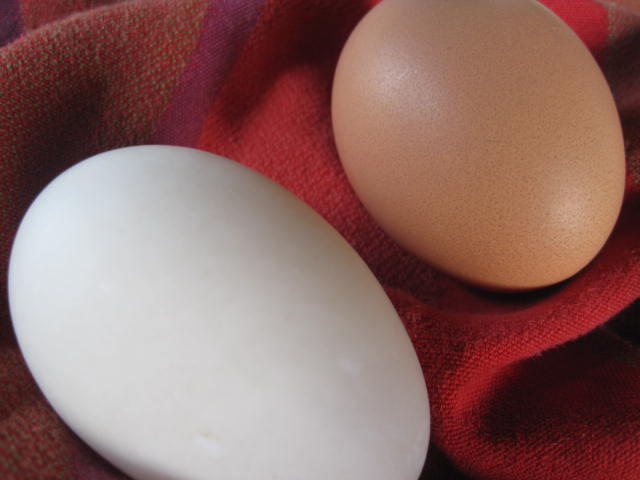
I found a couple eggs.

Duck egg, chicken egg

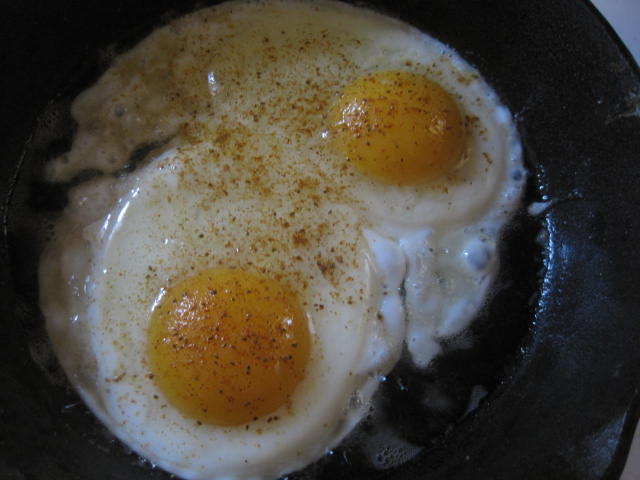
Fried them up in a bit of ghee and sprinkled them with a bit of Old Bay and sea salt.

Perfect little cast iron pan for frying eggs. Notice the big yolk on the duck egg?

And breakfast is served. With breakfast like this, I’m full, but not stuffed, and don’t get hungry again until 2 or 3 o’clock. Skipping lunch has become my new norm.

Pork patty, kale & onions, over easy eggs, and sauerkraut.

Without taking pictures, this nutritious breakfast takes me just minutes to make, thanks to the pork patties, which I make and cook in 10 pound batches. I love this recipe, made with plenty of sage and rosemary from our backyard and enough pepper to give them a bit of zing, yet not so much that the kids can’t enjoy them. I call these “perfect” because it took me several batches to get them just right. I hope you’ll try them and enjoy them as much as we do.

Luc with about half of the 10 pouds of pork patties we prepared together. I use my KitchenAid to mix the meat and seasonings.

Perfect Pre-cooked Pork Patties
Yields about 50 patties

2 12-inch sprigs of fresh rosemary or 3 teaspoon dry rosemary
8 tops–a good handful–of fresh sage or 3 tablespoons dry sage
3 tablespoons fennel seed, ground
3 tablespoons dried basil
1 tablespoon thyme
1 teaspoon red pepper flakes
3 tablespoons sea salt
1 tablespoon ground black pepper
10 pounds ground pork

Preheat oven to 400F. Line a rimmed baking sheet with parchment paper or a Silpat. Finely chop the rosemary and sage with a knife or in a food processor. Mix thoroughly with remaining seasonings. You should have approximately 1 cup altogether. Divide the herb mixture into four equal portions, about 1/4 cup each. Put 2-1/2 pounds of sausage in the bowl of a stand mixer, add one portion of herb mixture, and turn the mixer on low until the meat and herbs are thoroughly mixed. Remove meat and set aside in an extra large bowl. Repeat with the remaining meat and herb mixture.

Form patties using about 3-4 ounces of meat in each. Keep them all about the same size so they cook evenly. Place them close together on baking sheet. Bake for about 40 minutes, until just brown. Remove from oven and cool on a rack. Refrigerate or freeze and reheat as needed.

Luc flippin' burgers, I mean patties.

Posted in Uncategorized | 3 Comments